


Friday, June 10, 2016
To add/edit SEO settings, you will first need to login to your website using your credentials.
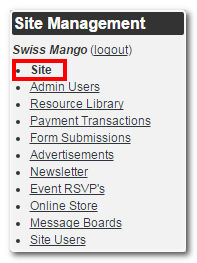
Once you are logged in, select “Site” from your Site Management menu
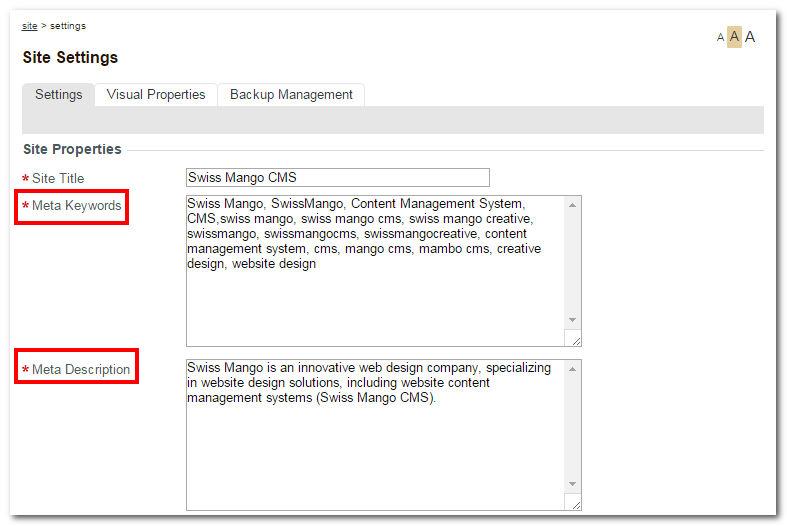
Here you will see the global Site Settings for your website. You will notice the Meta Keywords and Meta Description, as shown in the image below.
Your global Meta Keywords and Meta Description play for the whole website. If you do page specific edits they override the global Meta Keywords and Meta Description. Any pages you do not do page specific edits on will go by the Meta Keywords and Meta Description in your global Site Settings.
To start editing your page specific SEO settings, begin with your home page and work your way down your navigation menu for pages you want to do page specific SEO settings on.
To make the changes, you will select your home page.
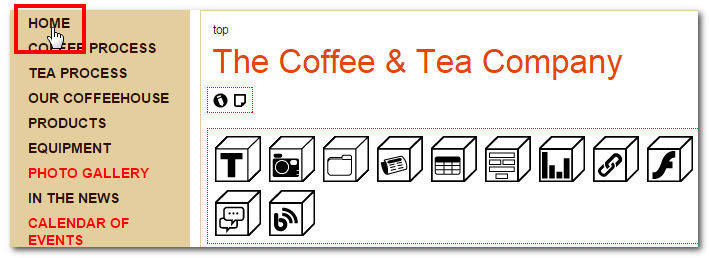
Once you open your home page, you will then click on the “Edit Page” icon located in the top left of your screen, as shown in the image below.
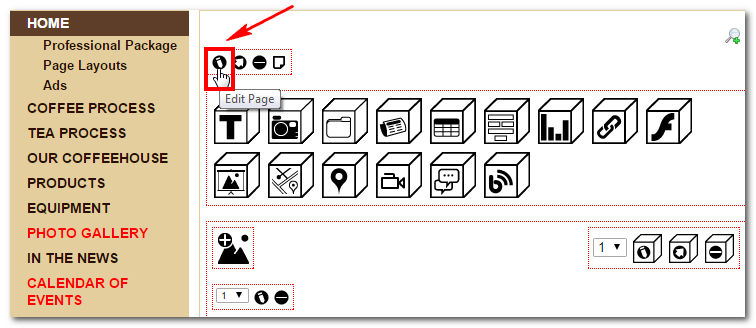
Once you click on the icon, the “Edit Page,” menu will appear.
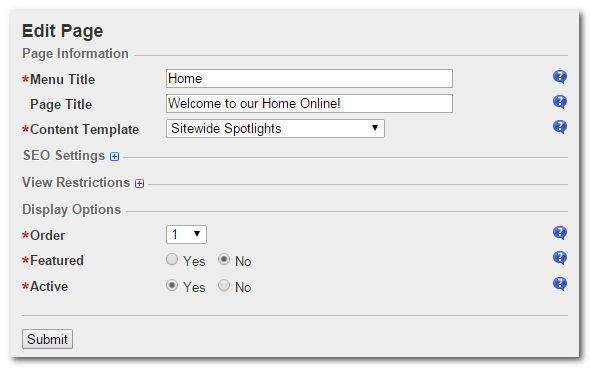
When the “Edit Page” menu opens up, you will want to expand the “SEO Settings” section by clicking on the “ ” icon. This will open up your SEO Settings.
” icon. This will open up your SEO Settings. 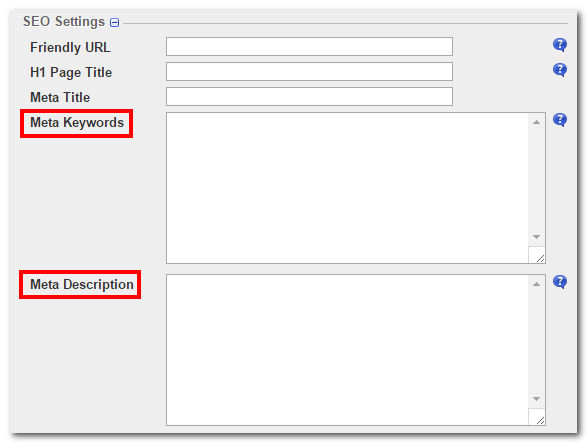
Here is where you will place different keywords and descriptions that are specific to that page. The “ ” icons to the right of the text fields explain what each of those fields represent.
” icons to the right of the text fields explain what each of those fields represent.Once you have entered your information in your SEO Settings, collapse your SEO Settings section by clicking the
“” icon again, and then scroll down and click “Submit” at the bottom of the “Edit Page” menu to save your changes.
” icon again, and then scroll down and click “Submit” at the bottom of the “Edit Page” menu to save your changes. 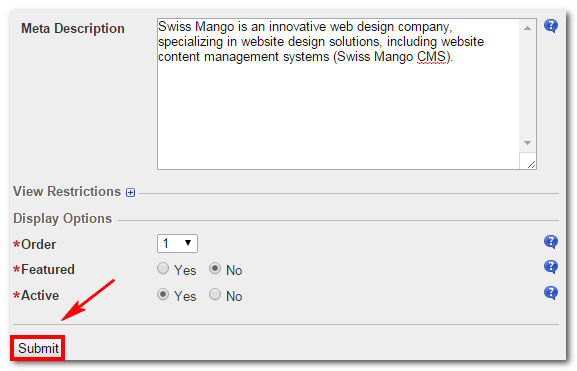
Once you click submit, the “Edit Page” menu will close and you will be taken back to your home page.
You will repeat this process on each of the pages that you want to do Page Specific SEO Settings on.
We hope this tutorial helped.
'
